
Connect an account to its employee and approved request without putting credentials in conversations. This walkthrough uses an illustrative company setup. Adapt the policy to your organization and validate it before rollout.
Treat access as a service request
A VPN request is an access request, not a demand for a laptop. Configure the relevant service and approval policy, collect its business justification and verify the route with a sample request. Complete the approval before provisioning. Record the outcome through the supported VPN ticket process so the account has an employee and request reference.
Understand the protected register
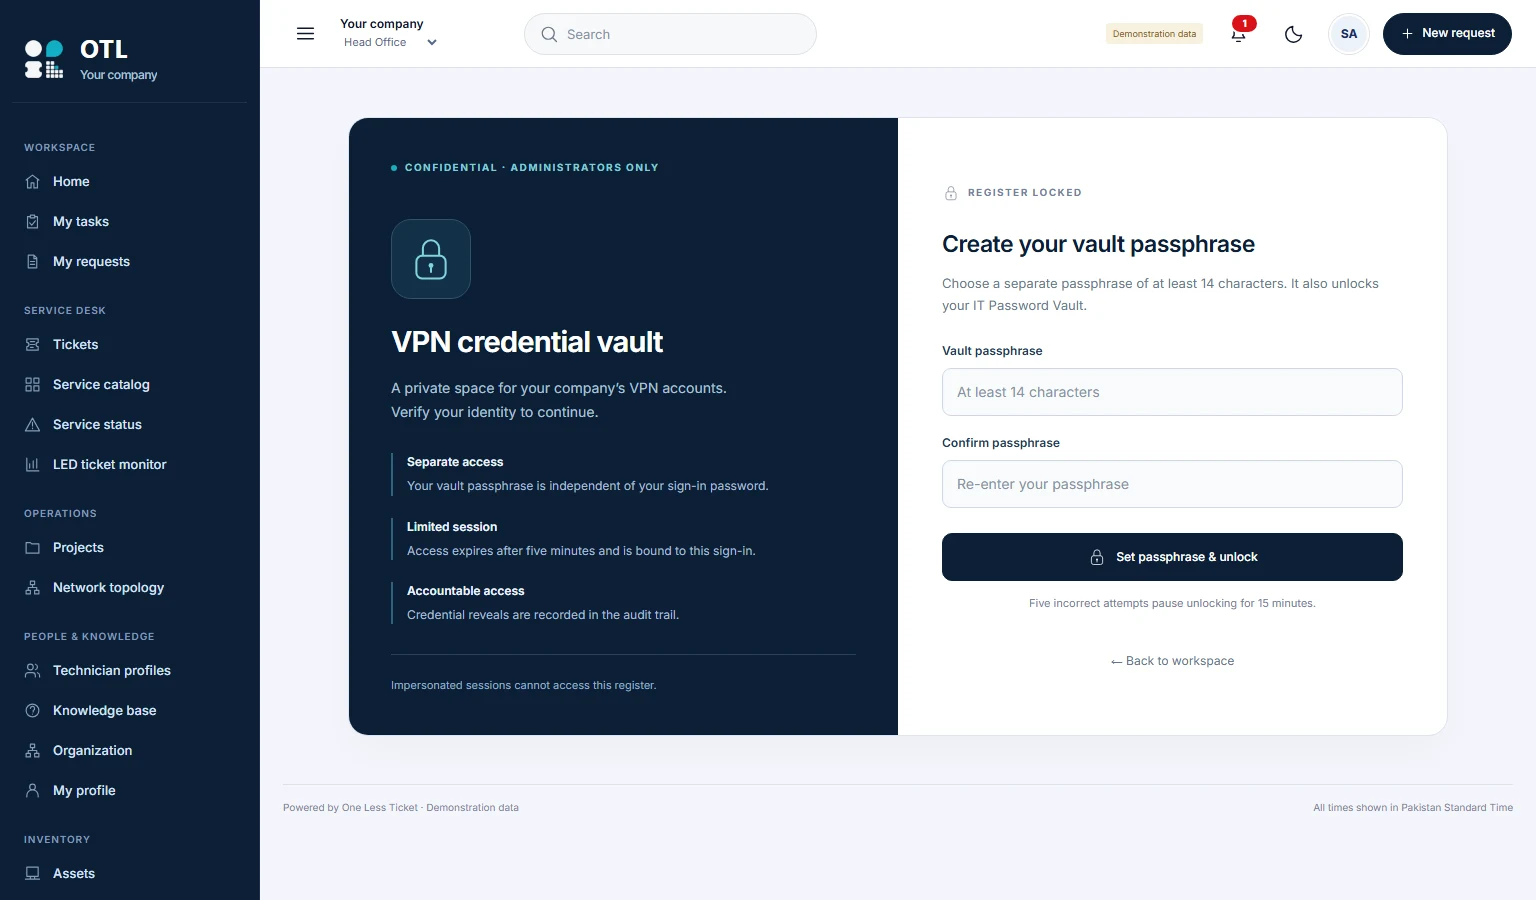
The current VPN register is restricted to system administrators and requires a separate vault passphrase. The screenshot shows the locked entry screen, not an account list. Access is time-limited to five minutes and bound to the sign-in; impersonated sessions cannot open it. Five incorrect attempts pause unlocking for 15 minutes. Do not put the vault passphrase into a ticket or share it in a team conversation.
Reconcile existing accounts once
The designated custodian can import an existing account list during the initial import window. Check that usernames and employee associations are correct before finishing the import. Closing that window makes approved tickets the route for future provisioning. Use source filters to distinguish legacy entries from ticket-provisioned accounts.
Find the account, then reveal only when necessary
Search using the exact VPN username or filter by account source. Open the associated request for its context. Credentials remain protected until deliberately revealed; reveal actions are audited. The ledger is for accountability, not for displaying passwords to everyone who can read a support ticket.
Close the loop when someone leaves
Disable the actual account on your VPN platform as part of offboarding, then record the outcome against the relevant work. Deleting an employee profile is not proof that gateway access has been revoked. Verify revocation with the platform responsible for enforcing access; the register itself is not a VPN gateway.
What belongs in the record
Keep the requester, business need, approval decision, provisioning outcome and account link together. Record relevant follow-up work without copying plaintext credentials into notes or attachments. Before rollout, test an authorized administrator, a technician and an impersonated session to confirm that ordinary ticket access does not grant vault access.
Follow the procedure, step by step
Open the register
Sign in as the authorized administrator and choose VPN Register.
Check: An impersonated session cannot open the register.
Set or enter the separate passphrase
On first use, enter at least 14 characters in Vault passphrase and repeat in Confirm passphrase. Click Set passphrase & unlock. If enrolled, enter the existing vault phrase and click Unlock register.
Check: Use the existing separate phrase if already enrolled in the IT Password Vault; the login password is not the vault phrase.
Respect the access window
Use the unlocked register within five minutes. Click Lock register when finished.
Check: Five incorrect attempts pause unlocking for 15 minutes. An expired unlock requires unlocking again.
Prepare legacy data
For existing accounts only, prepare CSV UTF-8 with employee_name,employee_no,username,password,notes headers. Employee number and notes are optional. Keep each batch within 100 rows and 1 MB.
Check: Required name, username and password values are present; temporary CSV is treated as sensitive plaintext.
Import the batch
Click Import existing VPN list, select the CSV and tick the existing-account confirmation. Click Import encrypted accounts.
Check: A duplicate username rejects the whole batch; do not assume partial import.
Verify imported records
Choose Existing list under Source and click Filter. Check employee associations and exact usernames.
Check: All expected records are present; temporary files are handled according to company policy.
Close initial import
Only after reconciliation, click Finish initial import, tick the completeness confirmation and click Close initial import.
Check: This cannot be reopened from the portal. Future provisioning follows approved VPN tickets.
Provision new access through a ticket
Use the configured VPN access service and complete approvals. Provision and submit the credentials using the authorized ticket process.
Check: The account is linked to the employee and request; no laptop is assigned just to complete VPN access.
Search and inspect
Use Exact VPN username and Source, then Filter. Use Reset to clear filters; use Next page where present. Open the linked ticket for approval context.
Check: Exact spelling and source are correct; a missing first-page entry is not proof the account does not exist.
Reveal deliberately
Click Reveal credentials. Review the private dialog only when needed; click Close and clear when finished.
Check: The reveal is audited. Values clear after one minute or when closed; never paste them into comments.
Offboard at the actual gateway
Disable access on the VPN platform, verify revocation, and record the outcome in the relevant work record.
Check: Deleting a profile or changing a ledger record is not gateway revocation.
Remove temporary exports
After checking the import, remove plaintext CSV copies according to policy.
Check: Browser parsing does not delete copies on your computer, in email or in backups.
Field reference and important rules
- Exact VPN username
- Exact lookup, not general employee-name search.
- Source
- All accounts / Existing list / Ticket provisioned.
- Unlock
- Five minutes, bound to this sign-in.
- Reveal
- One minute or until closed; audited.
- Initial import closure
- Cannot be reopened through the portal.
If something does not work
Import button absent
Check custodian rights and whether the initial window is closed.
CSV rejected
Check UTF-8 headers, required columns, duplicates, row count and file size.
Account not found
Clear filters, verify exact spelling and check pagination.
Unlock blocked
Respect the 15-minute pause. A normal login password reset does not disclose the vault phrase.
Before you roll it out
Run the normal path and an exception with separate requester, approver and technician accounts. Compare the visible result with your written policy, and keep a record of the checks.