
Use the ticket conversation as the shared history of a decision, not another disconnected inbox. This walkthrough uses an illustrative company setup. Adapt the policy to your organization and validate it before rollout.
Begin with ownership and the next step
Open the ticket and check the current stage, assigned technician and any pending approver. Those fields tell you whether the next action is a technical investigation, a management decision or a response from the requester. Read that context before posting another request for an update.
Write a useful follow-up
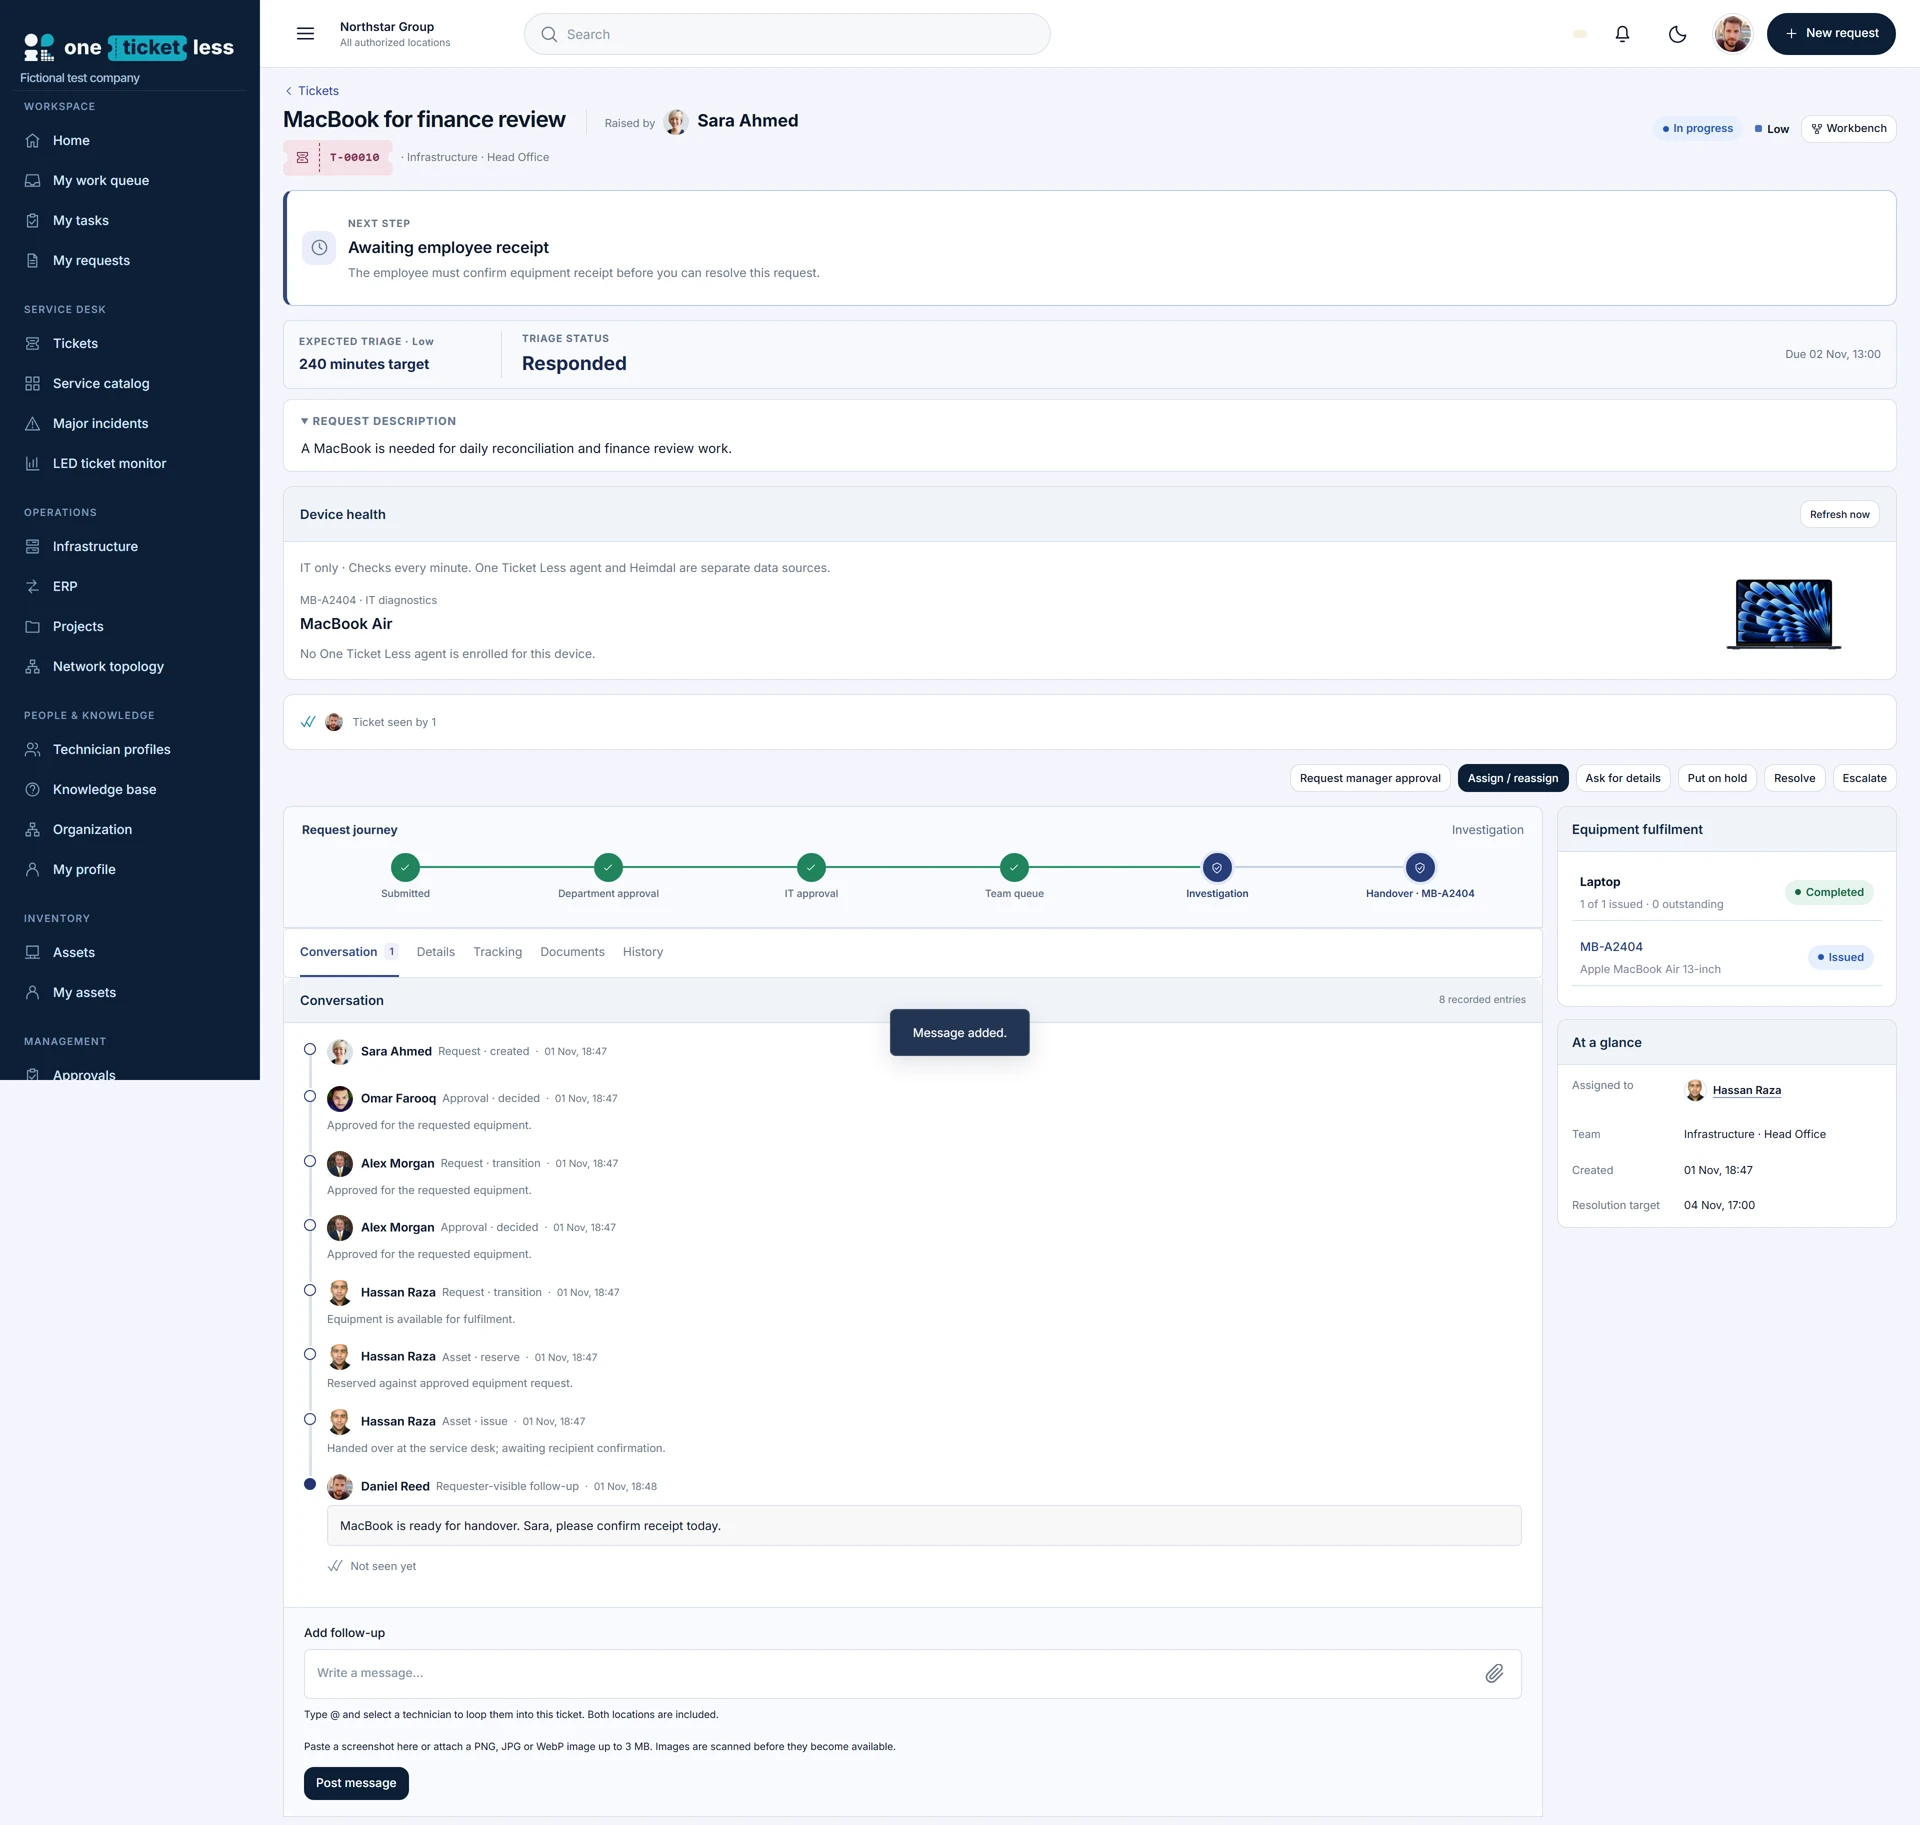
Describe what you checked, what changed and what you need next. Keep the message tied to the specific request. For example, state that the approved device is ready and ask the recipient to confirm handover, rather than writing only “done.” Never add credentials to a conversation that is visible beyond the protected register.
Bring in the right people
Use supported collaboration and mentions to involve the people needed for the work. Assignment still identifies the responsible technician; adding a collaborator does not automatically transfer responsibility. Managers should be able to understand why an extra person became involved from the written context.
Use read receipts correctly
The Seen control exposes recorded viewing activity with names, photos where available and timestamps. It helps establish whether an update was viewed. It is not an approval, proof of understanding or evidence that an asset was physically received. Use explicit decisions and receipt actions for those outcomes.
Preserve the decision trail
Keep approval, assignment and fulfilment actions in their proper controls so their history is recorded. A comment saying “approved” is not a substitute for the approval action. When the requester needs to clarify something, use the corresponding workflow action and explain the information needed.
Check completion from both sides
Before resolving, review outstanding requirements and record the solution. Verify any required user confirmation and asset receipt. During a pilot, sign in as the requester and technician separately to check what each can see and which action each is expected to take.
Follow the procedure, step by step
Find the ticket
Search by reference, subject or requester. Verify its number and requester before opening it.
Check: You are not replying to a different ticket with a similar subject.
Read the next step
Check current stage, assigned technician and pending approver or employee receipt.
Check: You know whether the next action is a technical task, decision or requester response.
Read the timeline
Open Conversation and review prior decisions and messages.
Check: System actions and user comments are distinguished; context is not repeated unnecessarily.
Write a useful follow-up
In Add follow-up, describe what was checked, the result and the specific next action. Avoid secrets.
Check: The reader can act without another vague request for an update.
Mention the appropriate person
Type @ and select a permitted suggestion where supported.
Check: The intended collaborator is actually selected. Mentioning someone does not transfer ticket ownership.
Attach evidence
Use the attachment control or supported image paste and follow the format/size limits shown by the form. Review the preview.
Check: The attachment belongs to this ticket and does not expose unrelated private information.
Post and verify once
Click Post message, wait and inspect the new timeline entry. If there is an error, inspect existing entries before retrying.
Check: The message appears once with the right author and content.
Inspect Seen
Click Seen checks/profile photos to open names and timestamps when viewing has been recorded.
Check: Read receipts indicate viewing, not approval, understanding or physical equipment receipt.
Use the actual workflow controls
Perform approval, assignment, clarification or other permitted actions through their controls, with required reasons.
Check: A comment saying approved or closed is not being mistaken for a workflow transition.
Finish with the solution
Review outstanding requirements, record the solution and perform the permitted resolve/confirmation actions. Inspect the requester view.
Check: Required approvals and receipt are complete; the final history explains the outcome.
Field reference and important rules
- Conversation
- Messages plus contextual events.
- Assigned technician
- Responsible owner, not everyone mentioned.
- Seen
- Recorded viewing, not a decision.
- Post message
- Communication, not automatic resolution.
- Workflow actions
- Permission-controlled state changes.
If something does not work
Cannot post
Read validation/errors and check access; avoid repeated clicks.
Mention not working
Select an eligible suggestion rather than typing a plain name.
No Seen record
Another authorized person must view the relevant content. Do not infer approval from a view.
Resolve blocked
Inspect outstanding approvals, fulfilment and receipt rather than issuing an unrelated asset.
Before you roll it out
Run the normal path and an exception with separate requester, approver and technician accounts. Compare the visible result with your written policy, and keep a record of the checks.